The other day, I received an unexpected package from my best friend Debbie, who lives all the way on the other side of the country in Maryland. She always sends me the most darling cards and lovely gifts.
A beautiful warm scarf from Seoul and a wristrest.
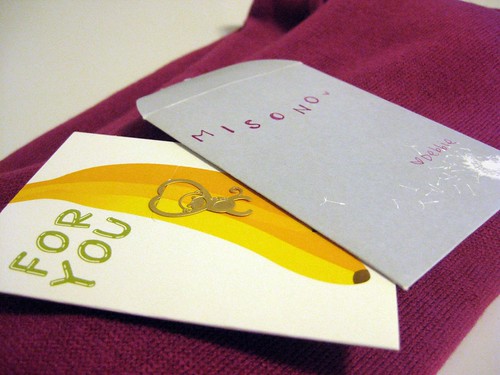
The cutest card + envelope! The monkey is a paper clip.
The most adorable wristrest... I was in need of one, too! I have loved tarepanda since I was in middle school, and Debbie always finds the most unique tarepanda goods.
I use a trackball these days, but the wristrest is a perfect match for the tarepanda mouse that Dan made for my birthday six years ago.
I miss my friends on the East Coast a lot, and it’s hard to only be able to see my best friend only once or twice a year. But I’m grateful that we’ve been able to keep in touch and stay close despite the distance. I’m always humbled and touched by her friendship. Love you bestest!
Before February 8th is over, I just wanted to wish my parents a happy wedding anniversary. It’s been 35 years since February 8, 1975. I can’t imagine how it feels to be married for so long, since Dan and I have only celebrated one wedding anniversary thusfar, but I hope that in 34 years, we can be just as cute as them.
For a while now I’ve been avoiding Apple branded mice due to their quirky nature. Like the awkward and utterly useless hockey puck mouse, first introduced with the original iMac. Following with the uni-body Mighty Mouse with a pseudo right click and horrid motion tracking. But there was one feature from the Mighty mouse that was very hard to beat, the scroll ball. Much like a Blackberry’s scroll ball, its 360 degree motion enabled it to move freely in all directions. OSX (MAC) was designed to specifically work with this feature, making it an integral part of the OS. No other mice could really beat the functionally of the 360 degree scrolling within OSX. Now that I use Macs for work, I officially have to use Macs more than PCs. Being said, I would modify the experience to best fit my taste in hardware.  Starting with non-Apple: mice, monitors, speakers, harddrives and even the keyboard. But like I said before, the Mighty mouse is designed for OSX.
So I present to you the love child of a Logitech G3 Laser and the Mighty mouse. It uses the body and the laser of the G3 along with the scroll ball of the Mighty mouse. Making the ideal 6 button mouse! Well at least ideal for OSX,
Before I go any further, I want to thank Dave Astolfo for his article which my project is heavily based on. After reviewing the scroll ball’s wiring schematic I was able to see that I can surely pull off this project. I am sorry for not making a detailed work-log, due to limited time. The wiring is rather simple, it basically requires 6 lines to fully utilize the scroll ball. 5 Volt, Ground, Hall sensors 1-4 (up, down, left, right). Â The 5V and Gnd were supplied from the G3 mouse but the problem was bringing in 4 extra lines. Naturally I looked for the most flexible 4 wire cable, which happened to be one of those self-retracting USB dongles.
Next step was to replace the stock scroll wheel from the Logitech G3 mouse with the scroll ball. It required much trial and error to get the prefect positioning. Much of the mouse’s inner body was trimmed to make room for the scroll ball and its mount.
The hardest part was to connect both mice into a 4-port USB hub, and fit both the PCB of the hub and the Mighty mouse into a tiny project box. The secret was to trim a bit of the PCB from the Mighty mouse. The final touch was to have the other 2 USB ports become functional as well.
And here it is, a fusion of the Logitech G3 Laser mouse and the Apple Mighty mouse! Only the best part of the Apple Mighty Mouse remains, the scroll ball. Don’t you love the idea of modifying? Lend me your thoughts please.
It’s officially “Celebrity Doppelgänger Week” on Facebook — the latest craze to hit Facebook is to change your profile picture to the celebrity you most likely resemble. I wanted to get in on it, but unfortunately, I’ve never really been told I look like anyone. I can, however, come up with some for the people around me. Take my sister, for example: whenever I introduce her to my Japanese friends, most of them tell me she looks like Japanese idol/singer/actress Aya Ueto. The ducky-faced smile is strikingly similar:
Ueto Aya (left) and my sister Miwa
And the hubby! I’ve heard various aesthetic comparisons of Dan to celebrities, both American and Japanese. Here are a few….
A picture of the hubby, for reference.
One is Japanese actor Kotaro Koizumi (å°æ³‰ å太郎), who also happens to be the son of former Japanese prime minister Junichiro Koizumi. I’m not so sure about this one, but a few Japanese friends have pointed it out. I think it’s mostly in the eyes (and the undereye folds) as well as the mouth area.
Japanese actor Kotaro Koizumi
Another one that is commonly pointed out is Kanjani8’s Yu Yokoyama. I sort of the see the resemblance here — again, it’s in the eyes and the mouth. Yu Yokoyama is more of a comedian than an idol in my mind, so this comparison always makes me laugh.
Kanjani8's Yu Yokoyama
Someone recently mentioned that Dan looks a lot like American comedian Steve Byrne. Steve Byrne is half Irish American and half Korean, so maybe the hapa common factor is what is at work here. I’m not sure how close the resemblance is, but I can say that Steve sure is a cutie! 😉
American comedian Steve Byrne
Oh! And we cannot forget the number one actor that Dan gets compared to. Drumroll please!
American actor Keanu Reeves
Whether or not the comparison is accurate, there’s a funny story associated with it. When Dan and I first started seeing each other, he brought this topic up with me, thinking that it would likely impress me. Here’s a summary of how it went:
Dan: You know, people have often told me I look like Keanu Reeves. (::silly grin::)
Misono: Eww, I hate Keanu Reeves. Worst actor ever.
So since then, Dan has not exactly been thrilled when people tell him he looks like Keanu Reeves, but I suppose there must be something there, since he gets it so often. I don’t really see it besides the faceshape and maybe the hair… and again, the part Asian ethnicity factor.
I actually submitted a photo of Dan to one of those celebrity look-alike generators and here is what it gave me.
Totally different results! Nicholas Tse? Chow Yun-Fat? And Shania Twain — interesting. I like how Dan also has a 56% resemblance to that terrifyingly creepy kid from the horror movie Godsend. Hmm….
After having that s’mores cupcake from Cupkates Truck last weekend, I became sort of obsessed. I kept having cravings for more of them the whole week for more. It’s like once my taste buds were awakened to the divine concept of s’mores in the form of a cupcake, they desperately needed to have more. I kept talking about them with Dan, and we then decided that instead of hunting that darned cupcake truck down again, we’d try making those delicious morsels ourselves.
We were a little apprehensive about the mission ending in disaster, but it turned into a fun collaborative project for the two of us. 🙂 And the results were not too shabby, if I do say so myself:
As I usually try to do here, I’m going to post the recipe, but I’m also going to try something new. My friend Luice recently introduced me to The Pioneer Woman Ree Drummond’s site. If you’re not familiar with her, she’s a woman who used to live an urban lifestyle (growing up in Chicago and then attending college in Los Angeles) who then fell in love with a cowboy (yes, a cowboy) and lives out in the countryside now. She calls her cowboy husband “The Marlboro Man” and her four adorable kids her “punks,” and despite the fact that her life is 180 degrees different from her previous city life, she actually fell in love with the country life. She has a huge online presence, with her site featuring extensive topics — everything from recipes to a personal blog and sections dedicated to photography, home & gardening and homeschooling. (I especially loved reading “Black Heels to Tractor Wheels,” her love story about how she met The Marlboro Man and how their whirlwind romance took off… although I confess I haven’t read all of it yet — it’s a series of blog posts.)Â Aside from being a funny personality and a really good writer, her recipes are awesome in that she uses step-by-step photos in them. I really love how she does this, because I’m a very visual learner and it really helps for me to see each of the steps as photographs (really pretty ones, too!) — when I buy cookbooks, I go out of my way to find ones that have lots of pictures in them. So I decided to try out this clever idea and do this post “The Pioneer Woman”-style. I’m not sure if it’s something I’ll be trying again anytime soon, though — taking step-by-step photos is actually pretty tiring and it’s difficult to get the shots to look good. Nevertheless, here goes my pathetic attempt.
The actual recipe is at the bottom of the post, for those who just want to skip the photos or want the detailed ingredients and directions.
The ingredients for the chocolate cupcakes: sugar, flour, cocoa powder, vegetable oil, whole milk (I only had 2% but the recipe calls for whole), baking powder, baking soda, eggs, and vanilla extract.
Combine the dry ingredients in a large bowl.
Stir the dry ingredients until well combined.
Pour in the other ingredients: egg, oil, milk, vanilla extract.
Beat with an electric mixer on medium speed.
Add 1 cup of boiling water. Batter will be watery but no worries! That is how it should be. (I know this photo doesn't look very appetizing, but trust me on this one.)
Fill the cupcake lines with the batter.
Fill 1/2 to 3/4 full with batter.
Bake for 22-24 minutes. Remove from oven and cool.
What you will need for the frosting: sugar, light corn syrup, mini marshmallows, vanilla extract, egg whites, cream of tartar, and salt.
Combine the sugar, corn syrup, egg whites, cream of tartar, and salt.
Place the bowl with the mixture over a pot of simmering water (not touching the water).
Continue stirring over heat until sugar is dissolved and mixture becomes warm to the touch.
Remove the bowl from heat and beat on medium-high speed with an electric mixer until soft peaks form and the mixture is still warm.
Add in 1 cup of marshmallows and 1 teaspoon vanilla extract. Reduce mixing speed to low.
Beat until marshmallows have melted and blended completely into the mixture. The frosting should be used right away.
Frost the chocolate cupcakes with the marshmallow frosting.
Pile on that frosting!
S'mores cupcakes are not complete without these key players: graham crackers and chocolate. Most recipes recommend Hersheys chocolate bars but I prefer Cadbury.
Chop the chocolates into bitesize pieces. S'mores traditionally use milk chocolate, but if you're a dark chocolate lover like me, feel free to use dark!
Stick pieces of graham crackers and chocolates into the tops of the frosted cupcakes.
Use a culinary butane torch to slightly toast the frosting. Carefully not to get too close as to scorch the frosting!
Dan is a closet pyro, so I think he enjoyed helping with this part the most. He mastered the "gentle sweeping motion" in toasting the frosting.
S'mores Cupcakes!
We were pretty impressed with ourselves. They actually came out looking pretty nice!
This one is my favorite. Dan did the frosting on this one!
Me with our masterpiece! They tasted as good as they look!
Posing with our cupcakes, in the lovely cupcake apron that Akiho gave me as a birthday present! I love Anthro's aprons; they're all so adorable.
Rows upon rows of s'more cupcakes. Some didn't come out as pretty-looking but they're still yummy!
A new household favorite! Will definitely be making them again.
Here’s the recipe without all the photos for anyone who’d like to print it out and try it themselves!
S’mores Cupcakes
(Note: I based my cupcakes on a recipe from Glory Albin of Glorious Treats, featured on Food Magazine. There are some slight variations and tweaks I made on mine, so feel free to follow either.)
The Chocolate Cupcakes:
Ingredients:
2 cups sugar
1 and 3/4 cups all-purpose flour
3/4 cup unsweetened cocoa powder
1 and 1/2 teaspoons baking powder
1 and 1/2 teaspoons baking soda
1 teaspoon salt
2 eggs
1 cup whole milk
1/2 cup vegetable oil
2 teaspoons vanilla extract
1 cup boiling water
Directions:
1. Line the cupcake cups with paper or aluminum liners. Heat oven to 350° F.
2. Stir together the dry ingredients – mix sugar, flour, cocoa, baking powder, baking soda and salt in large bowl.
3. Add the eggs, milk, oil and vanilla, and beat on medium speed with an electric mixer for 2 minutes. Stir in boiling water (batter will be watery but that is how it should be).
4. Fill liners approximately 2/3 – 3/4 full with batter.
5. Bake regular cupcakes for approximately. 22-24 minutes. Mini cupcakes for 13-16 minutes.
6. Cool completely on wire rack before frosting. (Makes approximately 24 standard size cupcakes.)
Marshmallow Frosting:
Ingredients:
2 large egg whites
1 cup sugar
6 tablespoons water
1 tablespoon light corn syrup
1/2 teaspoon cream of tartar
pinch of salt
1 cup miniature marshmallows
1 teaspoon vanilla extract
Directions:
1. In a large heat-proof bowl, combine the egg whites, sugar, water, corn syrup, cream of tartar and salt.
2. Set the bowl over (but not touching) simmering water in a saucepan and heat mixture, stirring constantly, until the sugar has dissolved and the mixture is very warm to the touch (about 160° F), about 3 minutes.
3. Remove the bowl from the saucepan. Using an electric mixer on medium-high speed, beat the mixture until soft peaks form, and it is still very warm, about 2 minutes.
4. Reduce mixer speed to low and add the marshmallows and vanilla. Continue beating until the marshmallows are melted and the frosting is completely smooth, about 3-4 minutes. Use frosting right away.
The Final Touches:
Ingredients:
2-3 large graham crackers
1 large chocolate candy bar (the ones that come in squares are easier to use): milk chocolate or dark chocolate, depending on your preference.
Directions:
1. Frost chocolate cupcakes with marshmallow frosting.
2. Top frosted cupcakes with a piece of graham cracker and a piece of chocolate.


 For a while now I’ve been avoiding Apple branded mice due to their quirky nature. Like the awkward and utterly useless hockey puck mouse, first introduced with the original iMac. Following with the uni-body Mighty Mouse with a pseudo right click and horrid motion tracking. But there was one feature from the Mighty mouse that was very hard to beat, the scroll ball. Much like a Blackberry’s scroll ball, its 360 degree motion enabled it to move freely in all directions. OSX (MAC) was designed to specifically work with this feature, making it an integral part of the OS. No other mice could really beat the functionally of the 360 degree scrolling within OSX. Now that I use Macs for work, I officially have to use Macs more than PCs. Being said, I would modify the experience to best fit my taste in hardware.  Starting with non-Apple: mice, monitors, speakers, harddrives and even the keyboard. But like I said before, the Mighty mouse is designed for OSX.


