Family lunch date at Luciano’s after picking Mio up from preschool on Veteran’s Day last week.
Our little lamb fell asleep in Daddy’s arms during lunch.
She rarely falls asleep on us like this these days, so I had to capture it. Reminds me of her baby days!
Here’s Mio admiring the Christmas model village they had on display while we were shopping at Michaels. She kept saying “sugo-i!” (Japanese for amazing, wonderful, awesome, basically anything that is impressive and knocks your socks off.) We had her repeat it for the video below:
Dan took Mio grocery shopping with him on Sunday afternoon, and she fell asleep so he pushed her around like this in the cart.
Ted and Jackie were in DC visiting on Tuesday! We had a memorable day at the Museum of Natural History.
After enjoying a late lunch and desserts in Georgetown.
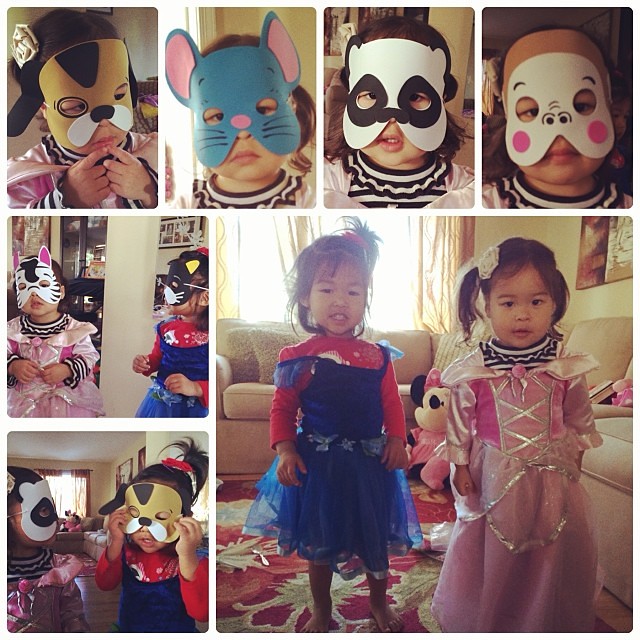
Masquerading with animal masks and dress-up at Kailee’s.
All smiles with her balloon after her dentist check-up today! (This was her second trip to the dentist ever – the first was back in May.) Pearly whites are looking good!
Can’t believe Thanksgiving and Christmas is right around the corner! The holidays are my favorite time of year. ♥
I felt like doing something crafty this weekend, and set out to find some containers to store my makeup brushes in on my vanity. I love mason jars, but wanted to make them a little more unique by giving them some color. I found this tutorial online and decided to give it a try! It was pretty easy and a cheap project requiring few materials.
Mason jars from the craft store. They were only $1.50 each at Michaels.
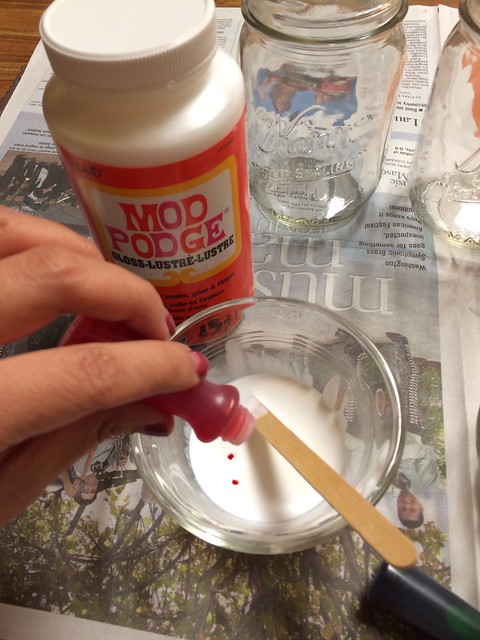
In a ramekin or small mixing bowl, mix 1 tablespoon of Mod Podge with 1/2 tablespoon water, and 7-9 drops of food coloring of whatever color you want your jar to be.
Mix well with a stirring stick. I decided to try staining the jars pink and mint. For mint, I used mostly blue food coloring with a drop of green.
Pour the Mod Podge mixtures into each jar.
Swirl the mixture around in the jars to ensure that the inside surface is completely covered. Drain out excess back into the bowls/ramekins and discard. Wipe the rims of the jars clean.
Turn the jars upside down to let the excess drip out for an hour. After that, wipe the rims of the jars again, place the jars open side up on a baking sheet and place inside an oven set on warm (approx 225 degrees F). Keep in the oven for 40 minutes, and be careful when you take them out as the jars will be hot.
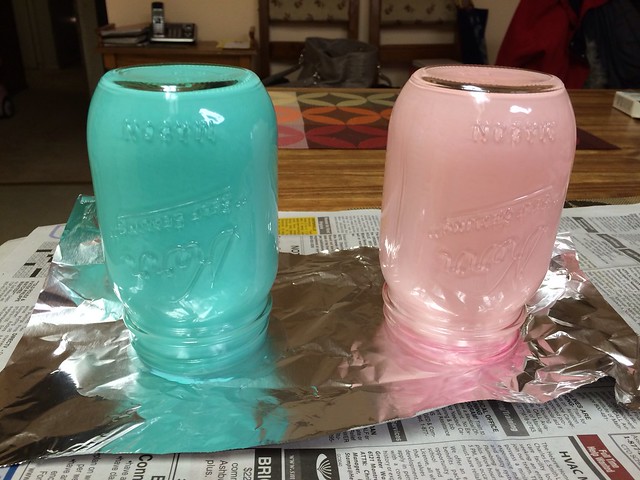
The stained jars out of the oven! I filled them with rice and stuck my brushes inside. I used one for smaller eye brushes, and used the other for larger face brushes.
Note that once the jars are colored using this method, you can’t use them for drinking/eating, nor put water or liquid in them or they’ll start peeling on the inside. They’re great for putting electric tea lights in for entertaining and event decorations, though, as well as for storing dry non-food items in as I did here.
Additional DIY from this past weekend: I loved these eyeshadows until they shattered during travel a while back. Saved them by re-pressing them using a few drops of rubbing alcohol, a tissue and a coin!
This time of year is gorgeous with all the beautiful fall foliage. Dan took some footage of Mio last weekend enjoying autumn, and created this sweet video! (Make sure to watch in HD!)
I love that Dan can create these beautiful videos that we can look back on when Mio is older to remember how she was in her younger years. I’m sure she’ll love to watch them, too! (If you missed the one he made this past spring, you can find it here.)
Mio’s showing so much personality these days! She’s so quirky and is always making everyone around her laugh. Here are some priceless moments that we’ve captured in the past week…
Love her expressions! They crack me up. Nemo peeking out from behind her is a funny touch…
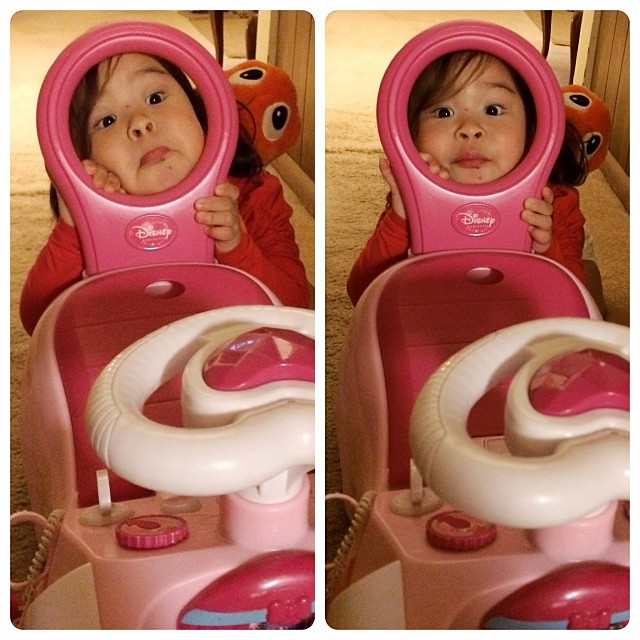
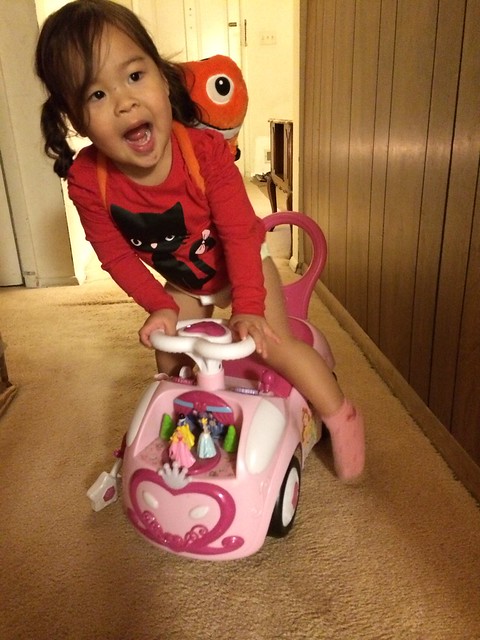
Wild rider!
The road to potty training is long and arduous. Today Mio ran around wearing her potty seat around like it was a floatie. Starting to think she’ll still be in diapers when we send her off to college…
Interestingly, Mio’s favorite item from her trick-or-treating loot is this pair of fangs…
These last couple ones aren’t comedic moments, but they’re still cute so I threw them in. 🙂
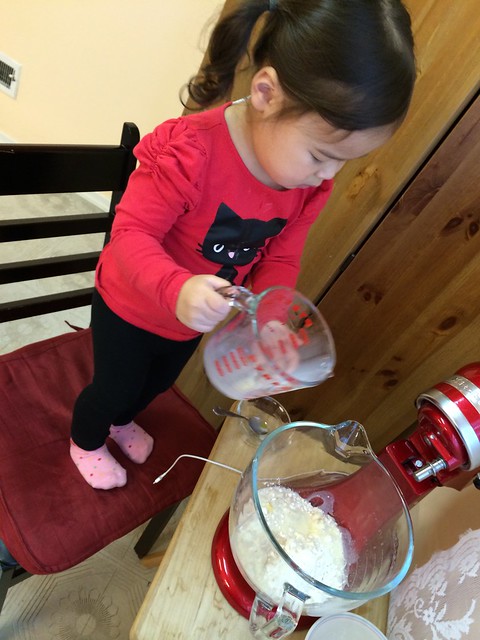
Something I’ve always wanted to do with my children is bake with them. Ever since I was a little girl, I always loved baking cakes, cookies, and all kinds of treats for the family. (My mom was much more the cooking type so I did all the baking in the house from an early age.) I always imagined that baking together would be a fun way for mothers and daughters to bond and have fun in the kitchen together, and now that I’m a mom of girls, I am excited about fully indulging myself in such fantasies, whether my girls will like it or not! Mio’s at an age where she can understand and follow most directions, is curious and interested in doing grownup things, and usually eager to help. It was rainy earlier today, and I thought it might be the perfect opportunity to stay indoors and try some mommy & me baking for the first time together! The project? To make red bean buns shaped like Mio’s favorite characters! I’d never actually attempted this particular recipe before, so in hindsight it was probably a little too ambitious and involved for our first collaboration together… but I really wanted to produce something that Mio would love!
Mio helping pour the yeast into the batter.
Pouring the milk and eggs in. Such a good helper!
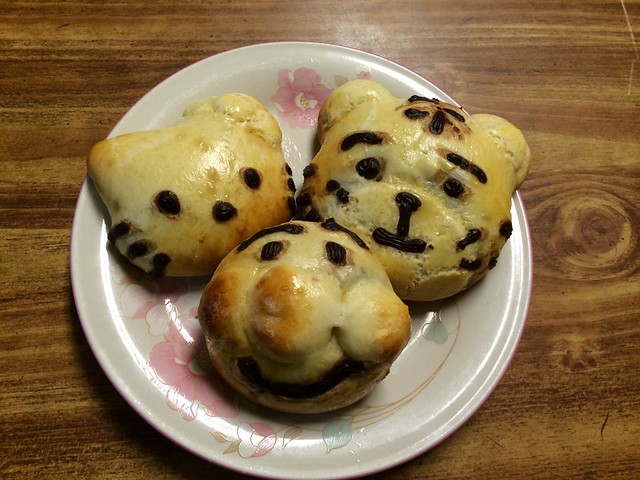
Some of the red bean buns out of the oven: Hello Kitty, Shimajiro, and Anpanman
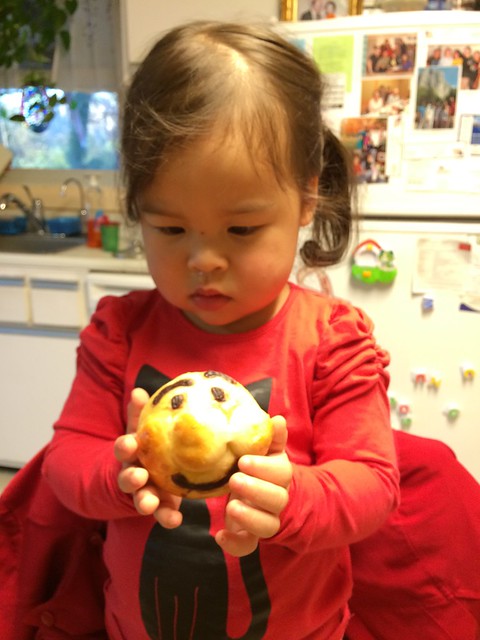
Mio couldn’t stop staring at our creations.
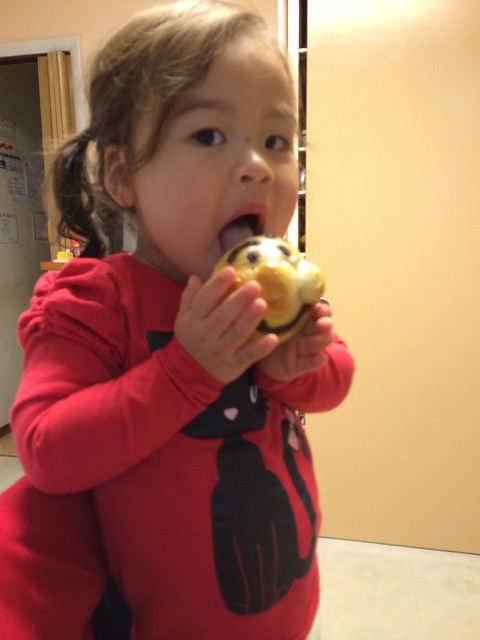
“Enough pictures! I want to get to the best part – eating!”
Mio seemed really pleased with our completed creations!
Though I of course ended up doing most of the work, Mio had a lot of fun being involved and helping with some of the steps here and there, and of course she excelled in the role she loves most — eating the finished treat! I’d say our first baking experience together was a success. I’m looking forward to many more countless baking adventures together with my sweet daughter(s)!