Happy Halloween! Our girls’ costumes this year are nigiri sushi: Mio is salmon, and Mirei is shrimp! They are just so cute that I could gobble them up…
This was my first time making their costumes and while it was a long and challenging process because I don’t have a sewing machine and had to hand-sew everything, it helped that Mio was really excited about the idea of being sushi for Halloween and kept excitedly exclaiming “Mio going to be SAH-MON SUSHI!!!” during the weeks leading up to Halloween. She was definitely my cheerleader and motivator to get the costumes completed and not give up! I’m pretty pleased with the final result, and the girls (well… Mio at least) seem to really like it! I don’t know if I’ll attempt to make another costume on my own again, though, until I have a sewing machine… I kept getting frustrated towards the end that it would have been faster and cleaner-looking if I had one! For those who want to know, I followed this awesome tutorial (note: it’s in Hebrew, so you’ll need the help of Google Translate!) that I found via Pinterest, and added some customizations of my own (I sewed the “rice” body from some white chenille fabric, and added green felt “baran”/grass to the headband, behind the wasabi and ginger). The costumes have definitely been a hit at the Halloween parties and events we’ve gone to this year, and it was a welcome departure from the typical princesses and fairies that we dressed Mio in the past couple years.
Hope everyone has a safe and fun Halloween weekend!
I felt like doing something crafty this weekend, and set out to find some containers to store my makeup brushes in on my vanity. I love mason jars, but wanted to make them a little more unique by giving them some color. I found this tutorial online and decided to give it a try! It was pretty easy and a cheap project requiring few materials.
Mason jars from the craft store. They were only $1.50 each at Michaels.
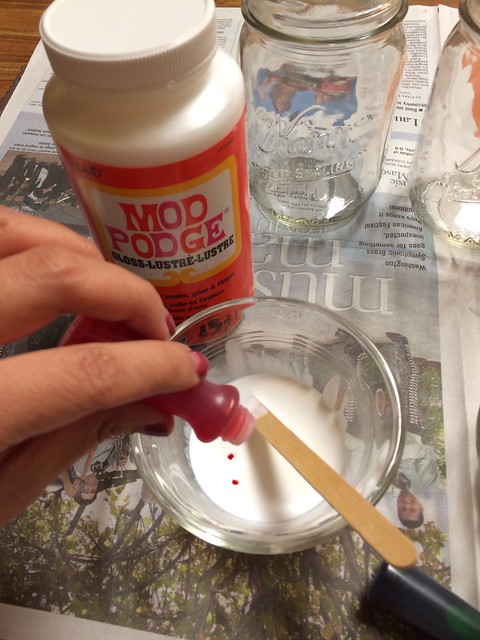
In a ramekin or small mixing bowl, mix 1 tablespoon of Mod Podge with 1/2 tablespoon water, and 7-9 drops of food coloring of whatever color you want your jar to be.
Mix well with a stirring stick. I decided to try staining the jars pink and mint. For mint, I used mostly blue food coloring with a drop of green.
Pour the Mod Podge mixtures into each jar.
Swirl the mixture around in the jars to ensure that the inside surface is completely covered. Drain out excess back into the bowls/ramekins and discard. Wipe the rims of the jars clean.
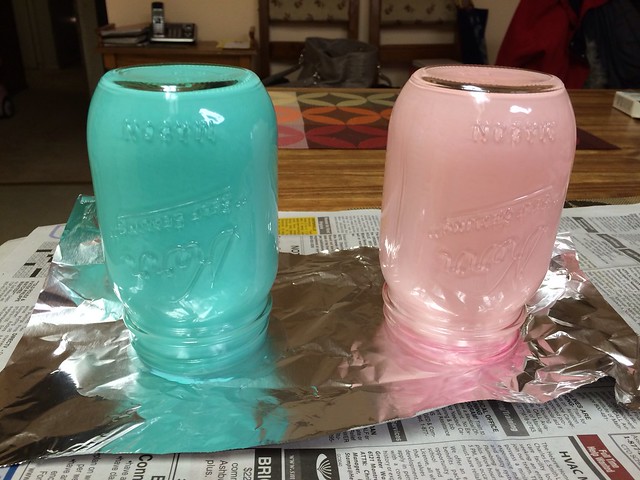
Turn the jars upside down to let the excess drip out for an hour. After that, wipe the rims of the jars again, place the jars open side up on a baking sheet and place inside an oven set on warm (approx 225 degrees F). Keep in the oven for 40 minutes, and be careful when you take them out as the jars will be hot.
The stained jars out of the oven! I filled them with rice and stuck my brushes inside. I used one for smaller eye brushes, and used the other for larger face brushes.
Note that once the jars are colored using this method, you can’t use them for drinking/eating, nor put water or liquid in them or they’ll start peeling on the inside. They’re great for putting electric tea lights in for entertaining and event decorations, though, as well as for storing dry non-food items in as I did here.
Additional DIY from this past weekend: I loved these eyeshadows until they shattered during travel a while back. Saved them by re-pressing them using a few drops of rubbing alcohol, a tissue and a coin!
I’ve been on a roll with creating hair accessories for Mio, and since a few people have asked about the petal clips that she’s been wearing lately, I thought I’d write a blog post about them. I recently ordered a ZUZII petal clips DIY kit from Etsy, because the hair clips you can make with them are truly adorable, and I loved having the option to make them myself! I was particularly smitten by the colors that were provided, and the reasonable price — at $8 ($10 if you include the $2 shipping), you can create six hair clips. Hair accessories for girls can run pretty steep, and I could easily spend more than that if I were to buy all the materials myself, so I thought this was a pretty good deal.
Everything you need comes in this cute little pouch.
The materials and instructions included in the kit. So awesome that the petals are precut to their various sizes, as that would have been the most annoying and time-consuming part if you were to completely create these from scratch.
They come with the snap clips that the flowers attach to.
A couple of the petal clips in progress…
All six Zuzii petal clips, completed!
Again, I love the colors! A great mix of soft and vibrant colors — Mio will always have something to match her outfits.
I was really happy with the way they turned out! (They’re so cute that I just might sport them in my hair myself… is that allowed? :P) The instructions were really easy to follow, and because the petals were precut, it was very quick and easy to assemble and stitch the flowers and create the hair clips. The best part? When someone asks about the pretty hair clip in your little girl’s hair, you can proudly tell them, “I made it myself!”
I really recommend this kit if you have a little girl and want a fun and easy creative project, or if you want to gift it (either premade by you, or for the recipient to make themselves). The Etsy shop also has a DIY kit for barefoot sandals with the same petals, which would be precious on a newborn, for those with younger baby girls.
Happy Easter! My favorite childhood memories of Easter was decorating Easter eggs with my mother and my brother every year. It’s been well over fifteen years since the last time I decorated Easter eggs, but becoming a mother myself brought back those memories and made me want to relive them this year.
As always, Dan was a good sport with my sudden urge to craft, and we decorated these eggs together on Friday night. (I know, we’re such party animals!) We huffed and puffed and blew the eggs out, and then tried a couple decorating techniques.
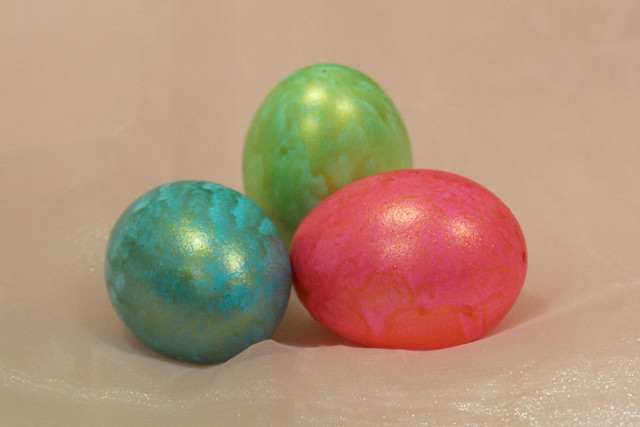
The first one we attempted was a “gilded” look with some metallic dyes. It didn’t come out quite as clean as I had wanted them too (I wanted them to have more uniform coverage), but as Dan pointed out, you have to have enough dye to dip it in, and we only had enough to paint it on with a brush. Oh well… it has more of an organic, abstract look to them with the painterly texture.
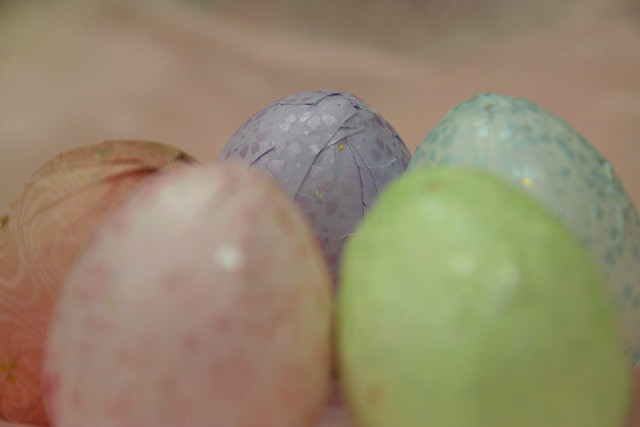
The second method I tried (at this point, Dan had given up and run off to indulge in a Breaking Bad-watching marathon) was one which involved wrapping the eggs in Japanese patterned paper. I was definitely happier with these results! 🙂 It’s a lovely Eastern take on a Western tradition.
The best part about these is that we can keep them around for decoration for a while, since the insides are hollow because we blew them out, and the decorated eggs won’t go bad.
I can’t wait until Mio is old enough to decorate Easter eggs with us! 😀
Last Sunday, we hosted a baby shower for our dear friends Megumi and John, who are expecting a baby girl around Christmas next month! It was my first time planning and preparing a shower, but it was a lot of fun to put together! (I did realize how much work goes into them, though, and awakened within me a deeper appreciation for all the effort friends have put into the brial shower and baby showers they threw for me in the past.) I’m glad that we had this opportunity to gather together as friends to celebrate this new life and welcome Megumi and John’s beautiful baby girl into our lives!
Setting up for the baby shower!
Megumi is a big fan of Studio Ghibli films, especially Totoro, so I created a Totoro-themed calendar for the guests to guess when the baby would arrive.
Guess when the baby will arrive!
Little umbrella favors for the guests to take home.
...complete with personalized tags.
And what is a shower without some delicious food? As baking is more of my forte than cooking, I made the desserts — cupcakes and sugar cookies!
Chrysanthemum cupcakes. The cream cheese frosting was a little runny, so it looks a little like the mum petals are melting.
This was my first time making sugar cookies with royal icing, but they turned out decent, thanks to some awesome tips from my dear friend and sugar cookie guru, Miss Megumi Kaminaga (different Megumi from the one we hosted this shower for). Thank you Mamagumi, and hope I’ve made you proud!
My first time making sugar cookies with royal icing.
Totoro, onesie, and baby carriage cookies
For the main course, we had a Korean platter, with bulgogi, japchae, and dumplings. Thank you for cooking everything, Kayo!
And a special thanks goes to Ann Helen for the delicious salad (not pictured) and the veggies, hummus, and homemade guacamole!
Mio took everything in as her Mama ran around preparing and setting up.
We also planned some fun games to play during the baby shower. The first was the Dirty Diaper game, in which we melted chocolates within these “diapers” and the guests had to guess what type of chocolate each diaper contained. (i.e. Butterfinger, Crunch, Mr. Goodbar, etc…)
The guests of honor, John and Megumi
Ann Helen and Aika take their guesses
A curious Mio watched as everyone played the game.
Aika and her adorable 5-month old son, Easton.
John got all of them right and was the winner!
The next game was the baby food guessing game. I soaked the labels off of baby food jars and the guests had to pass them around and guess what type of food each jar contained, from smell and (if they were brave enough) taste.
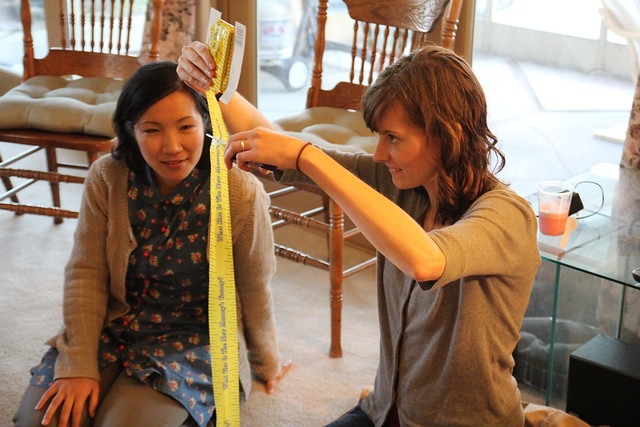
The last game we played was the classic “Guess the Mommy’s Belly Size” game, where we measured out tape to however length it was around Megumi’s baby bump.
John with the daunting task of taking the first guess.
Megumi still looks so petite for 8 months! She looks great!
Kayo measuring out Megumi's belly to get the actual measurement.
A few people came pretty close, but Kaz was the winner!
After the games, we went onto an activity of decorating onesies for Megumi and John’s baby! I’d seen variations of this where people used fabric paint, but I thought it would be a lot less messy and perhaps look nicer if we cut out fabric and attached them to the onesies with iron-on adhesive and peel-n-stick adhesive. Even the guys got into it and created some great custom clothing for baby!
Dan exercising his creativity.
Daddy-to-be John worked on making one, too!
Everyone hard at work.
Ironing on the letters.
The results were spectacular! Look at how cute everyone’s onesies turned out! I was so impressed! 😀
We had John and Megumi each pick their favorite designs out of all the great onesies everyone created. It was not an easy decision!
Having a hard time choosing...
John chose Kai and Koreana's collaborative onesie creation.
Megumi picked Ann Helen's lovely design!
Finally, it was time to open presents! There were such cute goodies for their baby girl…
Aika crocheted this adorable hat and mitten set for the baby!
Special thanks go Kayo, who cooked for the shower and MC-ed the games! I couldn’t have done it all without all the help from her, Kaz, and Ann Helen.
John and Megumi getting some practice entertaining a baby... and Mio just enjoying all the attention.
Thank you to everyone who was able to make it to the baby shower — I think it was a great success! 🙂 Congratulations to Megumi and John — we can’t wait to meet your sweet baby girl!